Monday, January 28, 2013

Gary Fong Lightsphere: Does It Work?

The Gary Fong Lightsphere, an interesting attachment for your on camera flash that gives the promise of studio lighting anywhere!

What it is, is a dome that that attaches to your flash to soften the light.  It comes in "Cloud" or "Clear" versions and you can have several choices of domes that cover the top.  The one I am using here is the Lightsphere Universal Cloud with a Cloud dome.

INDOORS:  Flash photography indoors presents a problem, you have to balance the light from the flash with the available light in the room.  If your indoor setting is lit with incandescent light and you are using a flash, you need to cover the flash with a filter to balance the "daylight" flash to the incandescent room lighting.  If you do not and you light the subject the subject will be lit (most likely with the correct color balance since your camera will Auto WB to daylight) but the surroundings of the the room will turn red orange.  Same with fluorescent except that the surroundings will be more green.  The Lightsphere can help you overcome this by for the most part overpowering the ambient room lighting.  The big dome on the flash with the flash standing straight up blasts the entire room with a soft daylight balanced light, and it really works.  The downside is the amount of power it takes.  Even in a normal size living room so much light is used to light the entire room that you are running near full power blasts which eats up batteries.  Shooting one wedding reception I shot through 2 full sets of batteries and part of a 3rd, so it uses a lot.

OUTDOORS:  Flash is a must for shooting people outdoors.  At short distances with the flash head aimed forward instead of up it can do the trick to give a nice soft light, but I am not sure that the light produced is any softer than the SB-600 provides with the built-in diffuser.  If you have your subject at a decent distance you need remove it, it wont let the light make it.  You can leave it on if you already have it on and just pull the dome off it, that is how I do it if I already have it attached.  Difficult to find a place to put the dome though, if I have jeans on I can usually get it into my back pocket, just don't sit on it.


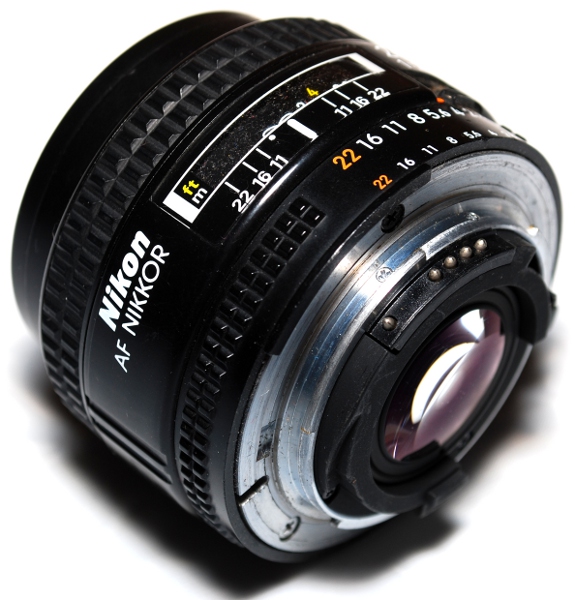
So down to business, I have shot numerous shots for comparison and am putting them in what I think is the worst to first order.  We have bounce flash at 90 and 45 degrees with and without diffuser, straight on with and without diffuser, a full studio light set up, and the Gary Fong Lightsphere.  All of these have been shot with a 100mm f/2.8 Series E lens.  The aperture has been varied as needed to get proper exposure, but we are looking at lighting in general, so for our comparisons here it is irrelevant. Lets see how it fares!


#8  Here poor Karli is just being blasted head on with the SB-600.  The light is harsh and there is a very crisp shadow on the backdrop from the flash.
Camera: Nikon D80      
Lens: 100mm f/2.8 Series E
Focal Length: 100mm
Shutter: 1/60
Aperture: f/2.8
ISO: 100
Flash: SB-600 (M 1/16)
#7  Dropping the diffuser down but still pointed directly at her made it a little better, but not much.  Here features are softend and the shadows are less harsh, but still not great.
Camera: Nikon D80      
Lens: 100mm f/2.8 Series E
Focal Length: 100mm
Shutter: 1/60
Aperture: f/2.8
ISO: 100
Flash: SB-600 (M 1/2 w/Diffuser)
#6  Oddly the 45 degree bounce with diffuser is next.  As we continue we see the light getting softer and more attractive and we are starting to get a more attractive photo here.  Obviously the shot would be helped by having an uplight lighting the backdrop to get rid of the shadow, but if we are going through that effort then why not get out the studio lights.
Camera: Nikon D80      
Lens: 100mm f/2.8 Series E
Focal Length: 100mm
Shutter: 1/60
Aperture: f/2.8
ISO: 100
Flash: SB-600 (M 1/1 w/Diffuser 45 degree bounce)
 #5  Here is the 45 degree without diffuser.  I really expected 5 and 6 to be reversed, and maybe this was due to the reduced power needed to run without the diffuser, but I like this one better.  There is even less shadow behind, maybe the tighter light source helps get it lit better.  I may play with this a bit more in my studio and see what comes of it.
Camera: Nikon D80      
Lens: 100mm f/2.8 Series E
Focal Length: 100mm
Shutter: 1/60
Aperture: f/2.8
ISO: 100
Flash: SB-600 (M 1/1 45 degree bounce)
 #4  And for my eye, they swap around again here.  This is the non-diffused flash at 90 degree bounce.  As the story continues to go, the lighting gets more even as we go.  However, one note to look at, the lighting is noticeably picking up color from the room paint which is brown.
Camera: Nikon D80      
Lens: 100mm f/2.8 Series E
Focal Length: 100mm
Shutter: 1/60
Aperture: f/2.8
ISO: 100
Flash: SB-600 (M 1/1 90 degree bounce)
 #3  Not much different from #4 is the 90 degree bounce with diffuser.  To my eye this is just a little better than the prior shot.  Again, getting color cast from the room paint.
Camera: Nikon D80      
Lens: 100mm f/2.8 Series E
Focal Length: 100mm
Shutter: 1/60
Aperture: f/2.8
ISO: 100
Flash: SB-600 (M 1/1 w/ diffuser 90 degree bounce)
 #2  The Gary Fong Lightsphere. As you can see here, the lighting is still as smooth and even as #3, maybe even a little more so, but the color cast from bouncing has gone away even though the flash head is in the 90 degree bounce position.  Since most of the bounce is happening off the dome of the Lightsphere you wont pick it up as much.
Camera: Nikon D80      
Lens: 100mm f/2.8 Series E
Focal Length: 100mm
Shutter: 1/60
Aperture: f/2.8
ISO: 100
Flash: SB-600 (M 1/1 Gary Fong Lightsphere)
#1  And of course, here is why studio strobes still sell.  Nice even lighting across Karli, no color casts, and no distracting shadows.  But we can't drag strobes everywhere, in fact, event shooting will demand portability, and in those cases the Gary Fong Lightsphere can be the ticket to getting great shots.
Camera: Nikon D80      
Lens: 100mm f/2.8 Series E
Focal Length: 100mm
Shutter: 1/60
Aperture: f/8
ISO: 100
Flash: 2 500 w/s Studio Strobes w/ Brolly Boxes
So my final thought on it?  Flash photography is the most difficult thing to get right.  You can destroy a picture with improper flash.  Indoors the Gary Fong Lightsphere does make the job easy at the expense of flash battery life.  Outdoors it is a toss up, you can use the Lightsphere or a diffuser for short distances.  Longer distances you will want to go to direct flash or a bounce card.  At $40 or so you can't really go wrong, and it will help almost anyone get great shots indoors.  A pro that shoots flash indoors can probably get better results with technique, but for most people the Lightsphere will let them do a better job.

Saturday, January 26, 2013

24mm f/2.8 AF-D: My Favorite 35mm/FX Lens


Camera: Nikon D80      
Lens: VR 18-55mm f/3.5-5.6G
Focal Length: 55mm
Shutter: 1/60
Aperture: f/8
ISO: 100
Flash: SB-600
View my Gallery of photos taken with the Nikkor 24mm f/2.8 AF-D.

Here it is, the 24mm f/2.8.  When I was shooting film I couldn't wait to get this lens.  You could buy it for a reasonable price used, I think I paid $250 for mine.  At the time it was the single most expensive piece of camera gear I had ever bought.  I'll admit it, I am a cheapskate and pretty much buy everything used.  I had a 28mm leans, and it just wasn't wide enough for my tastes.  This lens on 35mm/FX gets close, in fact when I shoot at car shows with this lens I typically have to wait for people to get out of my shot since they don't realize they are in it.

Camera: Nikon F4     
Lens: 24mm f/2.8 AF-D
Focal Length: 24mm
Shutter: N/A
Aperture: N/A
ISO: 100 (Ilford Delta 100)
Flash: None
In the shot above, I am typically less than 2 feet from the car, sometimes only 1 foot.  People won't realize you are getting the whole car in, so you'll have to wait.  But, for shooting at car shows this lens is perfect.  All the cars are right on top of each other so to single one out you have to get close.  Also, living in Arizona, we do a lot of car shows in the very early morning or in the evening.  A short focal length and a loose aperture allows for some nice slow hand held shooting.  This lens does not have VR but the reasonable sized f/2.8 aperture and short focal length can let you do some fairly low light hand held shots.
Camera: Nikon D80      
Lens: VR 18-55mm f/3.5-5.6G
Focal Length: 55mm
Shutter: 1/60
Aperture: f/8
ISO: 100
Flash: SB-600
This lens is small light and perfect for carrying all day.  I would go on hikes with only this light little lens and a 100mm f/2.8 Series E lens and never want for anything else the entire trip.  I shot this tree on a hike in Colorado, and the low position I took for the shot combined with the short focal length allowed me to pull the tree out of the background so it dominates the focus.
Camera: Nikon F4     
Lens: 24mm f/2.8 AF-D
Focal Length: 24mm
Shutter: N/A
Aperture: N/A
ISO: 100 (Ilford Delta 100)
Flash: None
It still works wonderfully on my D80, but it is equivalent to a 35mm on DX which honestly is a focal length I have never used much, so since my D80 is my go to camera nowadays, this little 24mm has seen a lot less use.  One other concern if you are going to use one, it will not auto-focus on the lower tier cameras like the D3200, D5200, and D40.

SPECS:
  • Focal Length: 24mm
  • Aperture: f/2.8 - f/22, 7 blades
  • Close Focus: 12"
  • Lens Type: AF-D
  • Filter Size: 52mm
  • Weight: 8.8oz (248g)
Here are some test images for comparison.  This is the overall image and is shot at the closest focus distance, so only about 9 inches or so from the target.
Camera: Nikon D80     
Lens: 24mm f/2.8 AF-D
Focal Length: 24mm
Shutter: 4 seconds
Aperture: f/8
ISO: 100
Flash: None
Quick inspection shows some barrel distortion.

The next image is the very center at full resolution.
Camera: Nikon D80     
Lens: 24mm f/2.8 AF-D
Focal Length: 24mm
Shutter: 4 seconds
Aperture: f/8
ISO: 100
Flash: None
To my eye this image looks very clean and sharp, but that is pretty much as expected.

And this final image is from the left corner at full resolution.
Camera: Nikon D80     
Lens: 24mm f/2.8 AF-D
Focal Length: 24mm
Shutter: 4 seconds
Aperture: f/8
ISO: 100
Flash: None
The corner shows just how good this lens is.  This image is very crisp and clean, and I cannot see anything here to complain about.  This just shows why this lens became my favorite, it looks great.

In the end, for me, I am still trying to find a use for this on DX.  For shooting FX it is my favorite lens and I use it 95% of the time on FX.  If you want to shoot close and in your face photos and you are using FX, get it and learn how to use it, and it will help you create masterpieces.  On DX it has for the time being been replaced by my VR 18-55mm f/3.5-5.6G.

View my Gallery of photos taken with the Nikkor 24mm f/2.8 AF-D.

Friday, January 18, 2013

PSAM: Why I Settle For Nothing Less

So you just got your first DSLR and are ready for action, you are excited to take that first shot, so you toggle your new DSLR to "Auto" scene and run outside.  I did it with my first DSLR too.  Modern DSLRs give you several programmed scene modes just like every point and shoot camera, but unless you are just wanting bigger and better lenses on a point and shoot, why not learn the advanced features your new camera has to offer.

First off let me explain about something scene modes, they are nothing magic.  All that the scene modes are s the "P" mode with specific generic setting set for a specific scene.  For example, for a landscape scene it will run a tighter aperture and will make the image a little sharper, for a portrait it will open the aperture up to reduce depth of field and reduce sharpness and saturation.  We can do all this on our own, and more.

I started my photography in landscapes, black and white, and color.  So most of the time I used Ilford Delta 100 (for black and white) or Fuji Velvia (for color).  But when I shot people I usually grabbed Fuji Astia 100.  When you shoot film, you choose that film for what you want to get out of it.  If I were to shoot people on Velvia they would look horrible with red faces and way too much contrast, but Astia has reduced contrast and less saturation for smooth features.  Using the PSAM modes you have virtually any film at your fingertips.

For black and white I shot most landscapes with Ilford Delta 100 and an orange filter.  If you shoot with any of the scene modes, you are shooting color and that is it.  Sure you can black and white any image after the fact, and probably get a decent result, but my goal when I shoot is to get the image straight out of the camera, and not waste time in photo editing software later.  Shooting in PSAM I can do that, and can give my camera any film I want.  I can go into the "Shooting" menu, "Optimize image" and select BW and I have black and white.  I can even add some digital contrast filters on if I don't want to use real ones.  When I want to do color, I have the "Custom" optimization already set up for it, color mode pumped up, saturation pumped up, and others to get as close to Velvia as possible.

Changing your "film" is just one piece that you can use to get anything you want straight out of the camera.  And lets face it, if you are like me and go away for a 3 day weekend and come back with 2000 shots, the last thing you want to do is have to fiddle each one to make it usable.  So now that you know why you want to, lets learn about PSAM!

Shot with my DroidX in cruddy light, it sucks,
just here to show the selector.  :-)

PSAM are four settings:

  • P - Program:  This program selects a shutter speed and aperture based on exposure value and usually focal length.  Generally, unless it can't help it due to lighting, it will stay a stop or two away from full open aperture and won't go tighter than f/11.  Your camera may be different, this is just a generality.
  • S - Shutter Preferred (Tv - Time Value for you Canon folks):  In this mode you select the shutter speed to use and the camera, using a similar program to the Program mode, will select the aperture.
  • A - Aperture Preferred (Av - Aperture Value for Canon folks):  This mode is the opposite of Shutter Preferred.  You select the aperture and the camera, using a similar program to the Program mode, will select the shutter.
  • M - Manual:  This is no program at all.  You set the aperture, you set the shutter.  Now, there is a twist here.  If you have Auto ISO turned on, the camera will vary the ISO to maintain correct exposure for the selected shutter speed and aperture value.  I have heard this called a bug, but I have found it very useful and will explain it later in this article.
So what do I shoot?  95% of the time my camera is in "P".  When shooting landscapes, cars and bikes, or even fast action of people, it is the mode that just gets the job done.  Unless there is an artistic need or a technical need for something else, I use "P".

Camera: Nikon F4      
Lens: 24mm f/2.8 AF-D
Focal Length: 24mm
Shutter: N/A
Aperture: N/A
ISO: 100
Flash: None

When I am around water, that is when I move from "P".  I love shooting water, it is one of my favorite subjects.  And I love smooth flowing water.  I love waterfalls that just look like silk.  To get what I want I switch the camera to "S".  This allows me to take my VR 18-55mm to 18mm and close to my subject and crank off a hand held 1sec exposure standing in the middle of a river.  "S" is the way to go for this shot since my main concern is a slow shutter speed.

Camera: Nikon D80     
Lens: 70-210mm f/4-5.6mm AF-D
Focal Length: 145mm
Shutter: 1/80
Aperture: f/4.8
ISO: 100
Flash: SB-600

The next time that I always differ from "P" is shooting portraits.  I also change my "film" here to a much more subtle setting.  When shooting portraits I want to get the depth of field just right.  That means I want full control of the aperture, so "A" it is.  


And the final differ is actually a different mode, "M", which is convenient for this article.  I use this mode, with Auto ISO, to shoot my fiance's flag football games.  Why you may ask?  Well, I run an old 70-210mm AF-D when I am shooting these games and put myself in a position to have a full frame shot of the quarterback from the defensive side of the field at 210mm.  This allows me to track the action as it comes up the field zooming from 210 down to 70mm.  So to sufficiently stop the action and get decent sharp shots I want a 1/250sec shutter speed.  Part two is that I want a fairly decent depth of field and being that I am running 210mm on the long end, I like to run it at f/11 if I can.  Since Auto ISO will vary the ISO for me from 100-1600, I can just leave these set and go.  If shooting in the early morning I do need to run a little more open aperture and a little slower shutter to maintain the ISO in range, so I just monitor the ISO as I go and then work the aperture and shutter towards where I want them as the sun comes up.  For me, it is the only way to shoot football.

I hope this helps drive you to learn how to use these modes, properly used they can greatly improve your creativity.

Thanks for reading, and happy shooting!

Thursday, January 17, 2013

VR (IS): Why You Want It On Every Lens

I'm not going to mince words here, VR (IS for Canon) is the absolute biggest advancement in photography in the last 20 years.  No other advancement has done anything to make your photos better.  Let me explain, every other advancement made has been an advancement in convenience, but they do not make your photos better.  Even digital, which is a huge advancement, only makes photography more continent, not better.  Sure, you can bring a tripod around, but why if you don't have to.  One of the hardest technical things to master will be shooting with very slow shutter speeds.

So for example, I can shoot reliably sharp photos with an 18mm lens at 1/10 a second without VR.  With VR I can shoot at 1 second and get it sharp.  To show the difference, here is a full size crop of fabric flowers at 1 second with no VR.
Camera: Nikon D80      
Lens: VR 18-55mm f/3.5-5.6G
Focal Length: 18mm
Shutter: 1/1
Aperture: f/5.6
ISO: 100
VR: Off
Flash: None


As you can see, the picture is useless, but now, the next shot all that is different is I flicked the VR switch on.  Still 1 second, still 18mm.
Camera: Nikon D80      
Lens: VR 18-55mm f/3.5-5.6G
Focal Length: 18mm
Shutter: 1/1
Aperture: f/5.6
ISO: 100
VR: On
Flash: None
That shot is sharp and good.

Now of course we could always use a big aperture instead.  For instance, I could use a 50mm f/1.8 instead of the VR 18-55mm f/3.5-5.6.  At 50mm the 18-55mm will have an aperture of about f/5.3.  Now Nikon claims you can shoot 4 stops slower shutter speed with VR, but even 3 stops will allow you the same exposure value as the 50mm.  For instance, if we follow the wives tale of shooting no slower than your focal length then the darkest light we would want to shoot in with ISO100 is EV8 which we would be at with ISO100, f/1.8, and 1/60sec.  With the 18-55mm at 50mm our aperture is 3 stops tighter at f/5.3, but because of VR we now can shoot 3 stops slower at 1/8sec to make up the difference and still have proper exposure for EV8.

An added benefit is that we don't have to change out artistic impression of a shot due to light.  As we learned in Aperture: Using Aperture To Focus Your Viewer, opening up the aperture shrinks our depth of field.  With VR we are now not locked into have our aperture determined by available light.  For me, it isn't even an option, if VR is available, then VR it is.  For instance, the Nikon's 55-200mm G is available in non-VR and VR versions, and even though there is a significant price break, non-VR isn't even an option for me.

I hope these articles are informative, drop me a line and let me know.

Thanks for reading.


Wednesday, January 16, 2013

Aperture: Using The Aperture To Focus Your Viewer

In the articles Stops: What Are All Those Numbers and Exposure Triangle: How To Make Those Nutty Numbers Work we learned how the aperture is one of the ways we control light, but that isn't all it can do.

The aperture has a creative function as well, it can control the depth of field.  The depth of field is how much is in focus.  Now don't get me wrong, only the distance you are focused at will be absolute tack sharp focus, but the aperture along with focal length determines how quickly objects go out of focus as they get nearer or further than the focused distance.

Camera: Nikon D80      
Lens: VR 18-55mm f/3.5-5.6G
Focal Length: 55mm
Shutter: 1/60
Aperture: f/11
ISO: 100
Flash: SB-600
Great for us because we can use that to creatively modify a picture.  Lets look at the picture at the right.  This is one of my prized possessions, my Petri f/1.9 rangefinder camera.  Here we can see that focus is is perfect on the focus ring, but decent focus is maintained throughout, only getting soft on the nearest part of the lens but not so soft that you cannot read the shutter speed numbers.  But lets say we wanted to focus our viewers attention on the focus ring, maybe we are giving a lesson and the reader may be confused if they see the numbers on the shutter speed ring.  What we can do then is open up the aperture from f/11 to f/5.6 to reduce the depth of field.


Camera: Nikon D80      
Lens: VR 18-55mm f/3.5-5.6G
Focal Length: 55mm
Shutter: 1/60
Aperture: f/5.6
ISO: 100
Flash: SB-600

Here we have reduced the depth of field dramatically.  The focus ring is still in sharp focus, but the shutter speed numbers have been all but obliterated.  Even the knurled silver aperture ring just this side of the large black focus ring has softened as well as the leatherette covering which is now only sharply textured near the focus ring and softened toward the perimeter of the photo.

As you increase in aperture size this effect gets even more and more pronounce with f/1.4 lenses getting a depth of field that may only be a few millimeters deep.

For the artist, this article is complete, it is really all you need to know.  Practicing and knowing how and when to use short depths of field, as well as long ones will help you make your art more interesting and convey a specific message or thought.  If you are a tech head, by all means continue on...

Now as I mentioned before, there is really only one distance of sharp focus, everything outside of that point has some sort of circle of confusion.  So what is a circle of confusion, well, lets say we have a white wall with a 1 micron dot on it and we shoot it with a macro lens at 1:1.  At the precise focus distance, there will be a 1 micron dot on our sensor.  But as we move from that perfect focus distance that dot will grow since that pinpoint of light will no longer make a pin point, but a confused circle.  The further from the perfect focus distance we are, the larger that circle gets.

Now how quickly that circle grows as we move from perfect focus is dependent on the aperture and focal length.  As the aperture gets larger, or the focal length gets longer, the circle of confusion will grow quicker.  As the aperture gets smaller, or the focal length gets shorter, the circle of confusion will grow more slowly.

A thing of note here is that the circle of confusion is only affected by focal length and aperture.  So lets say you take the exact same picture but with three different cameras.  First a DX sensor camera with a 35mm lens, second a FX sensor camera with a 50mm lens, and lastly a medium format camera with an 85mm lens. All of these combinations will produce roughly the same framing with the same angle of view.  But, if we sot them all at f/2 the depth of field among them would be vastly different.  The DX with the 35mm will have a huge depth with almost everything in focus, while the medium format with the 85mm lens will have almost nothing in focus but the actual focus depth.

So if you are selecting a lens specifically for short depth of field, keep in mind that as your focal length grows there is less of a need for big f/1.4 apertures.  Also it is of note that as you combine large apertures and long focal lengths the unnecessary accuracy of your focus goes way up and proper AF calibration will become paramount.  Even a 50mm f/1.4 will show minute inaccuracies, so the wonderful 85mm f/1.4 will require even more accurate focusing.

Hope this helps you enjoy your shooting and gets you what you want.

Thanks for reading!

Monday, January 14, 2013

Exposure Triangle: How To Make Those Nutty Numbers Work

The Exposure Triangle is an important concept to understand especially if you do any fully manual shooting.  It defines the interactions between the 3 determining factors of exposure.


In the previous lesson Stops: What Are All Those Numbers we learned about stops, and the numbering systems of Shutter Speed, ISO, and the Aperture.  Now we are going learn one other concept to help see how they interact together.

This concept is Exposure Value or EV.  The easiest definition of of EV is a value of light.  EV15 defines the light level of a typical sunny day.  Every EV value is separated by, you guessed it, a stop.  So EV16 is one stop more light (double the light) than EV15, EV14 is one stop less (half the light) than EV15.  So you can use EV to describe a light level.  To give us a reference point, EV0 = ISO 100 @ 1 sec @ f/1.  But EV0 does not have to be ISO 100 @ 1 sec @ f/1, but any combination that produces the same exposure.  If we increase the ISO to 200 we would now be at EV1, to get back to EV0 we need to change either the shutter speed to 1/2 sec or the aperture to f/1.4.

Camera: Nikon D80      
Lens: 24-50mm f/3.3-4.5G
Focal Length: 34mm
Shutter: 1/250
Aperture: f/4
ISO: 1600
Flash: None
Now lets see this in action. It isn't hard to see that even though the subject is the same, these two photos are drastically different. These shots were taken one after the other in the exact same conditions, but using the Exposure Triangle allows the manipulation of the shutter speed to either stop the water, or to have a nice smooth flow.
Camera: Nikon D80      
Lens: 24-50mm f/3.3-4.5G
Focal Length: 34mm
Shutter: 1/15
Aperture: f/4
ISO: 100
Flash: None


So the first shot is taken at ISO1600, 1/250sec, f/4 which is EV8.  To get to 1/15 of a second we need to slow the shutter speed by 4 stops (1/125, 1/60, 1/30, 1/15).  But just slowing the shutter speed won't do the job.  Since we slowed the shutter speed by 4 stops we are now 4 stops over exposed and are now adjusted for EV4.  What I chose to do was slow down the sensor by 4 stops (ISO: 800, 400, 200, 100) to get the exposure correct again and back to EV8.  I could have also reduced the aperture by 4 stops (f/5.6, f/8, f/11, f/16), or a combination of the two.

In this case our light level being EV8 gives us numerous options, these are some of the options for EV8:

  • ISO100, 1/15sec, f/4
  • ISO200, 1/30sec, f/4
  • ISO200, 1/15sec, f/5.6
  • ISO800, 1/30sec, f/5.6
All these provide the same exposure level but can dramatically effect the picture.  Look for the next article Aperture: Using The Aperture To Focus Your Viewer.

Thanks for reading!

Saturday, January 12, 2013

Portrait Perspective: Ignore Those Wives Tales

Camera: Nikon D80      
Lens: VR 18-55mm f/3.5-5.6G
Focal Length: 55mm
Shutter: 1/60
Aperture: f/5.6
Flash: SB-600
How many times have you seen this.  It is pretty common nowadays with the proliferation of social media, everyone want to show a new pic of themselves right where there at.  On the one hand, we now have more pics of ourselves and families than we ever have in the past, but at what expense.  Portrait pictures are all about the perspective of the shot, and the 3ft of your arm just isn't enough to do you justice.  Now, I have no thoughts that people are going to stop shooting photos of themselves with their phones, it is just way too convenient, but you as a photographer should keep it in mind.

Now one of the things that is great about the web is that there is a lot of information available, the bad thing is, there is also a lot of wrong information.  Now people aren't trying to point you in the wrong direction, they are just parroting what they've heard, it's human nature and we all do it.  The biggest one for portraits is the 85mm lens, or less often the 135mm lens.  The bad thing about this is that these wives tales have been around since film, and they didn't change when everyone started using DX sensors.  People just kept on parroting.  What you need to remember is that you select your focal length to frame the shot the way you want, you don't simply put on an 85mm lens and then move 5ft away from your subject to do a head shot.

Portraits are all about perspective and you get that perspective by maintaining a proper distance from your subject.  No matter what kind of shot you are taking, headshot, or full length, you need to maintain a minimum of 15ft from your subject for proper perspective.  Now I will demonstrate that.  My beautiful daughter has allowed me to post the absolute ugliest photo I could make of her on the web for your benefit, so here you go.

Camera: Nikon D80      
Lens: VR 18-55mm f/3.5-5.6G
Focal Length: 18mm
Shutter: 1/60
Aperture: f/4
Flash: SB-600
18mm DX / 27mm FX:  POOR GIRL.  She is such a trooper that she allowed this.  At this focal length I was right in her face, and just look at what it has done.  She is balding worse than her dad, her nose has grown like Pinocchio, where are her ears, and you can see every pore on her face.  Every feature at this distance of about 1.5 feet is grotesquely exaggerated.  Now even you people shooting yourselves with phones are doing it this close, but it magnifies just what your are doing with that close perspective.


Camera: Nikon D80      
Lens: VR 18-55mm f/3.5-5.6G
Focal Length: 35mm
Shutter: 1/60
Aperture: f/5.3
Flash: SB-600
35mm DX / 50mm FX:  Already we have improvement.  This has moved me back to about 4ft.  Her hairline is still receded  and her nose is still enlarged, but this is definitely improving.


Camera: Nikon D80      
Lens: VR 18-55mm f/3.5-5.6G
Focal Length: 55mm
Shutter: 1/60
Aperture: f/5.6
Flash: SB-600
55mm DX / 85mm FX:  Here is your fabled portrait lens (on 35mm film).  So this lens is really still too short for this shot as we are only about 7ft away from her here.  Even though we are still too close, the proportions are really starting to become "human" and this shot could be used if we can't get any further away due to a confined space.  And although this picture is looking good, you will see that there is still more improvement and that her hairline is still receded in this photo.


Camera: Nikon D80      
Lens: 70-210mm f/4-5.6
Focal Length: 110mm
Shutter: 1/60
Aperture: f/4.5
Flash: SB-600
110mm DX / 165mm FX:  Now we are getting somewhere.  This is longer than any of the so called "portrait lenses" due to the fact that we are framing a headshot here.  For this shot we are just short of the 15 feet at about 14 feet.  If you looked at these shots in order you probably thought the last shot looked really good, until you saw this one.  This is a completely usable shot, and I think my daughter would be happy with this one.  Unless forced by constraints of my environment, this is the closest perspective I'd use for any portrait shots.


Camera: Nikon D80      
Lens: 70-210mm f/4-5.6
Focal Length: 135mm
Shutter: 1/60
Aperture: f/4.8
Flash: SB-600
135mm DX / 200mm FX:  We are to the point of incremental improvement here, but still improvement.  We are about 16ft now.  Although the improvements are incremental, why not give your subject all you can and flatter them.  That is why I didn't stop here, I had zoom left, so lets see what's left.


Camera: Nikon D80      
Lens: 70-210mm f/4-5.6
Focal Length: 210mm
Shutter: 1/60
Aperture: f/5.6
Flash: SB-600
210mm DX / 315mm FX:  I am still seeing improvement here at 20ft, but it is minimal at this point.

Now portraits aren't just head shots, so lets take a quick look at a full length shot.


Camera: Nikon D80      
Lens: VR 18-55mm f/3.5-5.6G
Focal Length: 18mm
Shutter: 1/60
Aperture: f/4
Flash: SB-600
18mm DX / 35mm FX:  So here we are at that original 18mm lens we used for the first shot, but since this is a full length we are about 6ft away.  Not terrible, but we aren't doing her any favors here either.


Camera: Nikon D80      
Lens: VR 18-55mm f/3.5-5.6G
Focal Length: 55mm
Shutter: 1/60
Aperture: f/5.6
Flash: SB-600
55mm DX / 85mm FX:  Now we are back to 15ft, and there is a noticeable difference.  Just like the headshot, 15ft gives us the proper perspective for a full length photo too.  But as you see here, it required a much shorter lens than the headshot.

So make sure you flatter your subjects by providing them the proper perspective.

Thanks for reading.