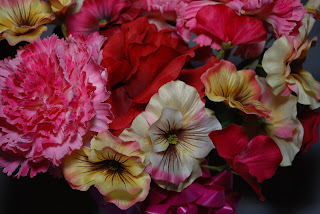
When we shoot film, we choose it specifically for the job. Want your colors to POP pick out a contrasty slide film like Velvia, shooting portraits grab something much smoother and finer. We can do the same for our digital photography.
Personally when I am shooting landscapes, cars, or motorcycles, give me it all. I turn everything up to get the color to scream. Here are my settings for this on my Nikon D80:
- Image Sharpening: +2 Medium High
- Tone Compensation: Auto
- Color Mode: IIIa
- Saturation: +
- Hue Adjustment: 0
 |
Camera: Nikon D80
Lens: 18-55mm f/3.5-5.6G VR
Focal Length: 40mm
Shutter: 1/60
Aperture: f/5.3
ISO: 100
Flash: SB-600 (w/ Gary Fong Lightsphere)
|
As you can see, the only items I haven't changed are Tone Compensation and Hue Adjustment, and Tone Compensation may get changed, but so far it has worked well at Auto.
Now for shooting people this is a horrible setting. For people I run something more like this:
- Image Sharpening: -1 Medium Low
- Tone Compensation: Auto
- Color Mode: Ia
- Saturation: Auto
- Hue Adjustment: 0
 |
Camera: Nikon D80
Lens: 18-55mm f/3.5-5.6G VR
Focal Length: 40mm
Shutter: 1/60
Aperture: f/5.3
ISO: 100
Flash: SB-600 (w/ Gary Fong Lightsphere)
|
So for people we need to run the subdued colors of Ia and a lot of sharpening pulled out. Saturation is set to Auto, and you could go further and set it to - to really reduce it, but Auto seems to work well.
If you have been reading this blog you know that I am a firm believer of getting the shots straight out of the camera. It saves me time not having to constantly fool and adjust every image. I do shoot RAW+JPG (which some consider foolish, but space is cheap) but the RAWs are there specifically as a backup or if I just utterly screw up (I am human :-) ). I use the RAW file usually only if the color still wasn't loud enough for me. If I do manipulate I only manipulate RAWs.
So you still want to manipulate JPGs? In case you didn't know manipulating JPGs is DESTRUCTIVE. Here we'll take a look at it. For this case I will start off with an image that is over exposed.
So you can see that this image is pretty well blown out. This histogram is all off to the right confirming this. So from here you'd want to fix this in your favorite image editing software. If you are fixing the JPG maybe you'd do something like this.
Much better. But what are all those gaps in the histogram? Well, in order to stretch the data that was there it had to cut gaps into your shot. Also those blown out pixels in the water, well, they are still blown out. But what if you had the RAW file to work with?
The NEF really helps out here because it has data that the JPG doesn't. So stretching out that histogram here retains a lot more information, and hey, a lot more of those blown out highlights are there now! Awesome. But why did I just waste several minutes making a useable image, when I could have got it straight from the camera.
No nasty blown out highlights, no gaps in my histogram (so no data loss), and best of all, no waste of my time. This goes for everything, exposure (which I used here since I had the pics handy), color saturation, sharpness, etc. Post production of all these items is a second rate solution.
In the end you'll do yourself a favor by setting up your camera to get the shots how you want them straight out of the camera. For me, not wasting time manipulating images on a computer means I can be out shooting more, and that is what it is all about.
Thanks for reading!


No comments:
Post a Comment